Showing posts with label Grading. Show all posts

Thursday, December 10, 2009

1 Day Grading Course in Madison, MS

Hey everyone! I just wanted to let you all know that ALACAD will be having a 1-day Grading Course on January 28, 2010 in our Madison, MS office. Space is limited and is first come first served. For more information follow this link!

Here is a brief description of the class.

This 1-day course will cover several options for grading and show the user how to utilize the different grading techniques to their advantage. Grading in Civil 3D is probably one of the most powerful functionalities in the software, but is also one of the least understood.
This course will begin with a discussion of some basic properties of a surface in Civil 3D and how to modify the surface. This will include a discussion on the methodology Civil 3D uses for creating a TIN. In addition, we will cover the definition and use of Feature Lines. Finally, we will look at some methods for creation grading plans, or finished grade surfaces using the different tools at our disposal.

Monday, July 14, 2008

Grading Short Course Notes Part 3

Okay, let's finish this site. The first thing we need to do is create a new site. We will do this the same way we created the Temporary site in the Part 2 of these notes. We will change the name of this site to "Final Site."


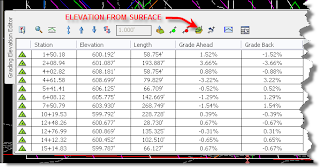
Next, we will click on the Grading menu at the top of the screen and select "Create Feature Lines from Objects." Select the poly line that surrounds the parking lot and building pad. The Create Feature Lines dialog box will open. We want to make sure that our site is set to Final Site. If it is not, select it from the pull down menu. We will set the style of our feature line to Basic, and make sure that we are on the C-TOPO-FEAT layer. Select the feature line that we just created and right-click. Select "Elevation Editor." From the tool bar select the Elevations from Surface icon.


The Select Surface dialog box will appear. Select the Temporary Surface that we created in Part 2. You will notice that the elevation for each vertice is updated. If, by chance, your Temporary Surface does not encompass the feature line you will have some vertices that have a zero elevation. This can be fixed by assigning an elevation to those vertices in the elevation editor or you can use the "Set Grade/Slope Between Points" icon from the Feature Lines Toolbar. If you use the "Set Grade/Slope Between Points" command, you will be asked to select the starting point and elevation and the ending point and Grade/Slope/Elevation. (Just follow the prompts on the command line.)


Next we will select "Create Grading" from the Grading Menu. On the Grading Creation Tools Toolbar we are going to select the leftmost icon to set the grading group. In the Site Name pull down menu we will select our Final Site. Then to the right of the Grading Group Name pull down you will see two (2) icons. We will select the icon on the far right - the "Create Grading Group" icon. In the Create Grading Group dialog box enter the name of Parking, select the Automatic surface Creation box and select the Use the Group Name check box. Then click "OK."


Back on the Grading Creation Tools toolbar we want to select the "Set Surface" icon, second from left, and set the surface to EG. Next we will set the Grading Criteria to "Grade to Surface." you will be asked to select a feature line. Select the feature line to which we set the elevations from our Temporary Surface. When prompted to select a side to grade, pick outside of the feature line, i.e an area that is not inside the parking lot or building footprint. You will be prompted to apply the grading to the entire length. Enter "NO." When prompted for a starting point use your endpoint OSNAP to select the endpoint of the feature line on the right side of the driveway at the entrance to the site. When prompted for the end point select the endpoint on the west side of the driveway. Follow the prompts on the command line. If you desire to change the cut or fill slope go ahead. I used a 5:1 cut and a 6:1 fill slope in my example. The grading limits and proposed contours should be shown on the screen.


Go back to the Grading Menu and select "Create Infill." Pick a point inside the parking lot to create the infil. This should connect the contour lines accross the parking area.


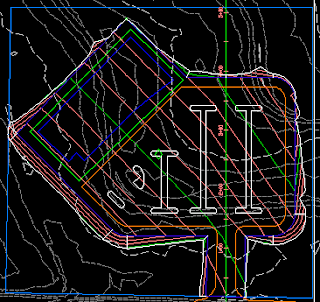
The screen capture above shows the site with the tie-in grading and infill grading through the parking lot.


Next, we will create feature lines from the outlines for the islands in the parking lot. Select one of the islands and right-click. Select "Select Similar" from the pop-up menu. Click on the Grading Menu and select "Create Feature Lines from Objects." In the Create Feature Lines dialog box set the style to "Bottom Curb," select the Erase Existing Entities check box and select the Assign Elevations check box. Click "OK." In the Assign Elevations dialog box change the surface to Parking and click OK. Click on the Grading Menu and select "Create Infill." click inside each island to create an infill for the islands.


A warning here... You will probably have to go back and create another infill for the parking area. When I stepped through this exercise, the centroid of the infill grading that I created after tying my parking surface into the EG suface fell inside one of my islands. That is not an issue, you may just have to create another infill for the rest of the parking lot.


Now let's click on the Grading menu and place our mouse over "Edit Feature Line Geometry." You should get a fly-out menu. Select "Stepped Offset" from that menu. We will now offset the curb feature lines to the inside a distance of 0.5 feet and an elevation difference of 0.5 feet.


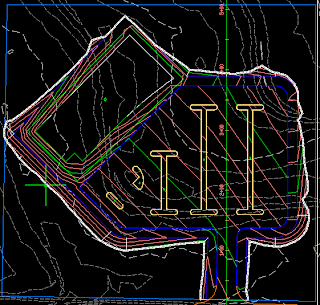
We need to create a feature line from the polyline that represents the edge of pavement for the parking lot. When creating the feature line, assign elevations from the parking surface. Then using the same commands create an offest of the edge of pavement o.5 feet to the outside and o.5 feet elevation difference. This will create a curb around the parking area. The only step left is to create a feature line for the building and assign an elevation to it. Again, you may have to create another infill for the area bounded by the tie-in grading, the building pad and the back of the curb around the parking area. When you have completed these steps, you should have something that looks like this:


The only thing left to do here is create our detention facility. I am going to leave that to your imagination.

Wednesday, July 2, 2008

Grading Short Course Notes Part 1

Wow! I want to thank everyone that showed up for Alacad's first Short Course for Civil 3D users in the Mobile Area! The turn out was fabulous. Thank you all for participating and asking questions that I know others were wanting to ask. Okay....enough of the niceties, let's get to the dirt!

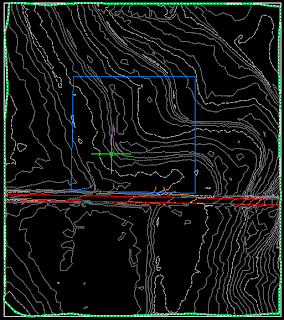
This short course walked through one method of grading a small commercial site with a building and parking areas. At the end we added a detention facility, too. To get started we had a drawing that consisted of an Existing Surface from an aerial photograph.


Now, if you will recall I talked about one of the new features for creating surfaces in AutoCAD Civil 3D 2009. That new feature is a Data Clip Boundary. When creating a surface from a large data set we create the Data Clip Boundary as the first operation. Then as we add data to our surface, i.e. points, point groups, breaklines, etc., the software will check the data to see if it falls inside the limits of the Data Clip Boundary. If the data is outside the boundary it is ignored.


Once we have our existing ground surface created, it is time to do some fun stuff! The next thing was to import the layout for the site as shown below.


Next, we created an alignment from the polyline that runs north and south through the parking lot. In creating the alignment we did not place the alignment on a site and we gave it a name of baseline. This makes it easier when creating the preliminary surface. Then we created an EG profile and profile view of the alignment. Next we create our design profile. This profile can be created with tangents only, or you could include vertical curve data.

Join me next time for Part 2 of the Grading Short Course notes.

Thursday, June 12, 2008

Grading Short Course

I wanted to take a couple of minutes and invite everyone in the Mobile, Al area to a FREE Grading Seminar that I will be presenting at the Bienville Club on Friday June 27, 2008 from 8:00 am until 10:00 am. The Bienville Club is located at 107 St. Francis Street Mobile, Al. Again, registration for the event is free and seating is limited.

The seminar will consist of creating an existing ground surface, inserting a layout into the drawing and creating a site grading plan using the grading tools in Civil 3D 2009.

Register here.