But, what if you can't find a style to modify to look like the particular label that you want? Well, that's when we get to be a little creative. Let's take a look at creating a Point Label Style. For Visual effect create a point using the create points command from the Points menu. Accept all of the defaults when creating the point. Then click on the point, right-click and select edit points. This brings up the Point Editor Panaorama Vista. Scroll over to the right until you see the columns labeled Point Style and Point Label Style. When you first select the point and scroll to the columns listed above the fields will probably be blank, unless you have specified a particular point style or point label style.

Click in the field for Point Style. This will bring up the Select Point Style Dialog box. Choose Basic from the pull-down menu and then select Edit Current Style from the button to the right of the pull-down menu. Change the marker style to "X" by clicking on the "X" button under Use Cutom Marker. Then click OK twice to get back to the Points Editor.
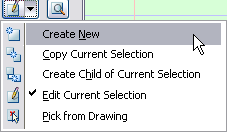
Next Click in the field for Point Label Style. This will bring up the Select Label Style Dialog Box. In this dialog box click the down arrow to the right of the button and Select Create New.
 This will bring up the Label Style Composer Dialog box. On the Information tab give your new style a name. Click on the General Tab. Here you can set the text style, visibility and layer for you new point label style. (Hint: In 2009 the Standard Text Style maps to the Simplex font.) Next click on the Layout Tab. This is where all of the fun begins! The very first thing that you will see is a pull down menu called Component Name. To the right there are four buttons. These buttons are: Create Component, Copy Component, Delete Component and Component Draw Order. Click on the Create Component pull-down. You have options for creating text, line and block components. Choose Text to create a text component. Since we are dealing with Point Label Stlyes there will be three components present in the Component Name pull-down.
In the field for Name under the General Node give your text component a name. For instance let's create a component for the Northing of the point. So we name the new component "Northing." We will leave the visibility set to true so that we can see the new component. The next field assigns the anchor component. Now, If we are creating a breand new label and we have no other text components in the style, we will have to anchor the new text component to the feature. If we have other text components we may choose to anchor to the feature or one of the other text components. When we have decided what to anchor our new text component to, we have to choose the anchor point.

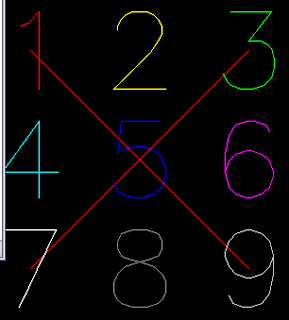
The screen capture above shows the nine possible anchor points associated with our point object. The anchor points are: Top Left, Top Center, Top Right, Middle Left, Middle Center, Middle Right, Bottom Left, Bottom Center and Bottom Right. The same nine anchor points are available if we choose to anchor our new text to an existing text component also. Just remember that each of the text components that we create also have attachment points that correspond to the nine positions shown above. So, what does that mean for us? That gives us a multitude of options for creating our labels.
Some other options for our labels are that we can use the x- and y-spacing to offset the attachment point from the anchor point if we need more space between the label and the object. (Think station labels.) We can also add rotation angles into the label style. The thing to watch out for here is that if we rotate the text component that is attached to the feature, we do not rotate the text components attached to that particular text component.
This is an overview of creating a point label. Be adventurous and explore the options for other types of labels.
No comments:
Post a Comment